

Does your WordPress website need a Google Tag Manager? I mean there are the developers working wonders and then there are the non-tech ones. In this article, we’ll discuss how Google Tag Manager is gonna help you build up potential tags for your project and how to add Google Tag Manager to WordPress. So, you can easily deploy analytics and measurement tag setups securely and without difficulty.

What is Google Tag Manager (GTM)?
I’m sure the majority of you guys are going to skip this section because GTM isn’t rocket science for you. But just so to be clear with the basics, Google Tag Manager is a powerful tool. It enables quick and simple updating of measurement codes. Also, updates the associated code fragments or tags, on your website or mobile application.
Google Tag Manager lets you track events such as clicks, impressions, and conversions. You need to use Tag Manager to create and manage tags. Using GTM all of these scripts may be added and managed with ease from a single dashboard.Tags are custom tags that you create to track specific aspects of your website.
It is an excellent package that you can use to manage your website’s Google Analytics data. In this article, I’ll show you how to install Google Tag Manager in WordPress. Your marketing approach will become more effective and precise as a result of eliminating the manual procedure of establishing tags.
You don’t have to write a new code each time you want to add a tag. GTM is a tag management solution that enables you to create and monitor tags via a user interface.
But what are Google tags?
Tags are little pieces of code that you insert into the HTML or JavaScript code of your website to retrieve certain data. The length of a user’s visit to a page on your website, form submissions, how a user came to your website, and the links that the user clicked.
Even the items that users withdrew from their shopping cart are examples of necessary tag information for marketers. Each tag keeps track of a separate object. For marketers or business owners, manually coding tags can be a time-consuming and challenging procedure.
Your entire tagging procedure will be considerably simpler using Google Tag Manager. Simply insert a code once into the pages of your website, and Google Tag Manager will code and embed it for you each time you wish to create a tag.
Significance of GTM
Now that we’re clear with the tags and function of the tag manager, let’s understand how it is going to improve a WordPress website.
1) It’s so Simple to Use!
One of Google Tag Manager’s main benefits is that it doesn’t require any programming experience. You don’t have to do complicated website code. Anyone can easily make modifications, add new tags, test each change, and deploy tags.
This gives you and your team autonomy and streamlines your workflow, which shortens the time between launches. It gives your IT department the time it needs to concentrate on more crucial issues, like the reasons why your website is loading so slowly.
2) Saves Time!
GTM allows you to independently apply tracking codes, which saves you time. There is no longer a requirement for a marketer to send tracking code to a developer. Because the developer may install the code a week later due to their busy schedule.
You won’t need to send and receive emails back and forth to follow more events that week. Through the GTM platform, all tracking codes (also known as tags) can be added, modified, and removed.
3) Everything Stays at One Place
Everything is centralized with GTM. The time when a developer had to locate specific JavaScript code snippets in the source code of a website or app to add, remove, or modify them is long gone. Now that everything is in one location, human errors that cause data to be erroneous and some codes to be overlooked no longer occur.
4) Troubleshooting gets Easy!
It’s simpler to troubleshoot and fix tag mistakes because everything is in one location—even before they’re published. In addition to information regarding triggers and other details about the data within tracking tags, GTM’s Preview Mode will automatically show you which tags are functioning and which ones aren’t.
Datalayer Checker and Tag Assistant are two additional beneficial GTM tools.
5) Create templates of your own
You can export all of your tags, triggers, and variables from GTM into a single file, which you can use to make your custom templates for frequently used programs. This can be helpful if you want to integrate the same Google Analytics event for different clients.
Earlier, Google also introduced Custom Templates, a feature that enables the public to create and distribute freely usable custom templates. Additionally, GTM offers a ton of integrated tags that you can utilize for things like remarketing and conversions from Google Ads. This enables team members without technical skills to customize tags without having to learn complex code or rely on a developer’s assistance.
6) Offers Auto-Event tracking
Auto-event tracking, a feature included with GTM, automatically logs events without the use of customized JavaScript code. Once you’ve activated certain triggers, GTM will immediately begin listening for specific website activities, albeit setup is required and it’s not as simple as clicking a button.
7) Get it for FREE!
It was kind of skimmed over earlier, but GTM is completely free and ideal for small and medium-sized organizations. Larger enterprises can upgrade to Tag Manager 360’s premium GTM version.
8) User Control and manage Permissions
You have complete control over who can make what modifications using GTM. You can easily manage who has access to make changes (such as adding tags, macros, and rules) to the website. Options include no access, read-only, editing, and publishing rights.
9) Gives Version Control
In GTM, an archived version is always stored whenever you make a change. This makes it simpler to undo changes, roll back to a previous version, or undo changes you unintentionally published to a live site before the tags were finished.
Version control allows you the freedom to switch between versions without worrying about doing any lasting harm. Now that you are aware of the abundant benefits that GTM has to provide for your WordPress site, I believe the urge to install it on your site has arisen.
Let’s learn the installation process now.
Activate & Add Google Tag Manager to WordPress:
There are 3 simple steps that you need to follow to add GTM to your WordPress website. But before we go down that road, you have to perform this simple process to set up the GTM.
Step-1: Download the Chrome Extension for Google Tag Assistant Legacy (Free).
Step-2: Create an account on Google Tag Manager for free:
a. You must first sign into your Google account.
b. You will be taken to the account creation page if you are creating a Google Tag Manager account for the first time.
Step-3: Complete the following details:
a. Account Name: This is the name by which you refer to this account.
b. Country – Origin of country.
c. Container name — Enter the website’s URL
d. Target platform — Indicate where Google Tag Manager will be added (e.g. on your website, mobile, etc)
e. (Optional) Give Google your data in an anonymous manner.
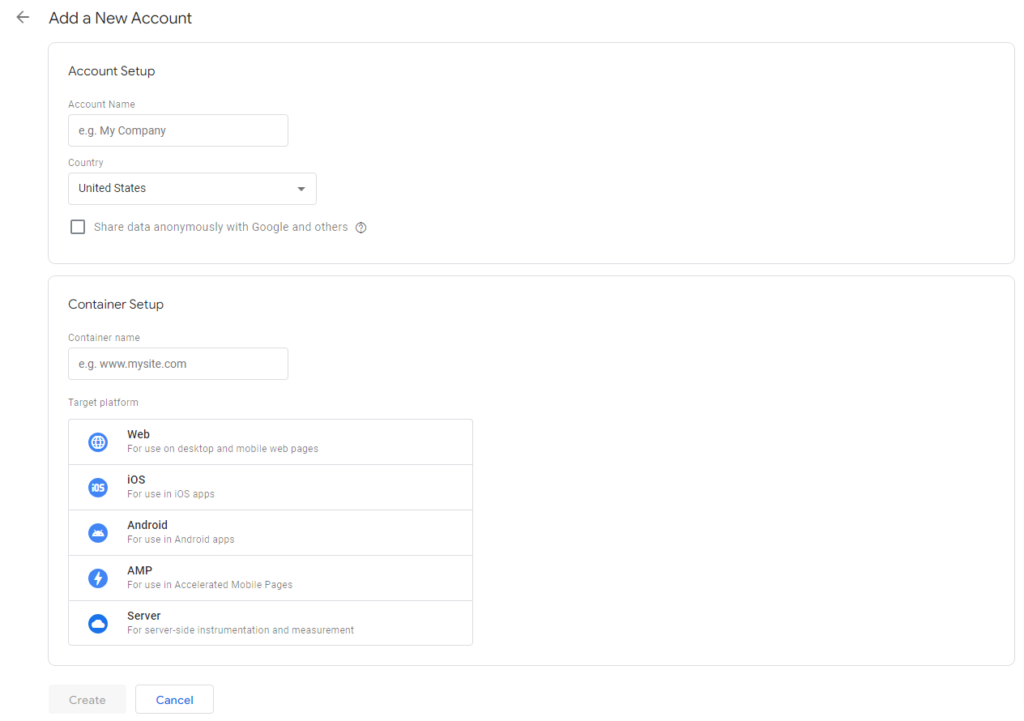
Step-4: After completion. Click “Create.”
Step-5: A Google Tag Manager Terms of Service window will appear. Check the box, then select “Yes“.

Step-6: The code to install Google Tag Manager will be visible. Since you won’t be manually adding code to your WordPress site, disregard this. Select “OK.”
Step-7: Write down your Google Tag Manager ID once you are in your workspace.
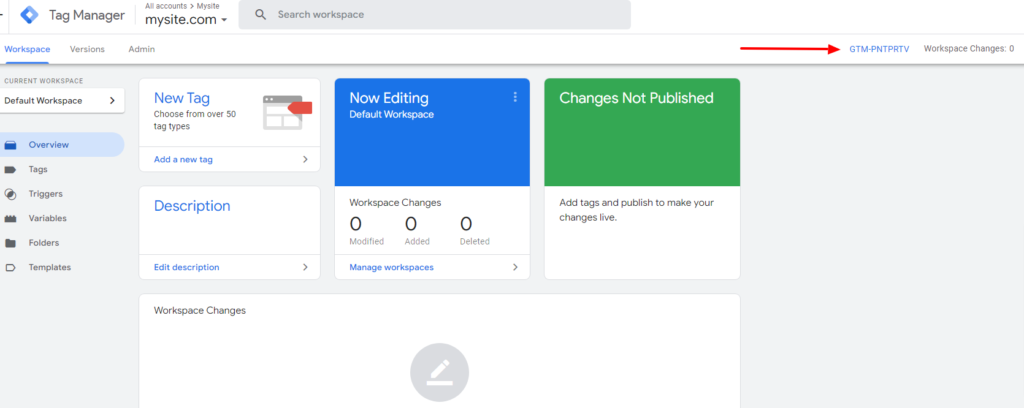
a. Simply select “Submit > Publish” Publish your Google Tag Manager container as usual.

Set up the Google Tag Manager plugin for WordPress.
Step-1: Access your WordPress website.
Step-2: Click on Plugins > Add New in the sidebar of WordPress.
Step-3: Use the search bar to look up “Google Tag Manager for WordPress.”
Step-4: Download and install the GTM4WP plugin in place. (the image may be different)
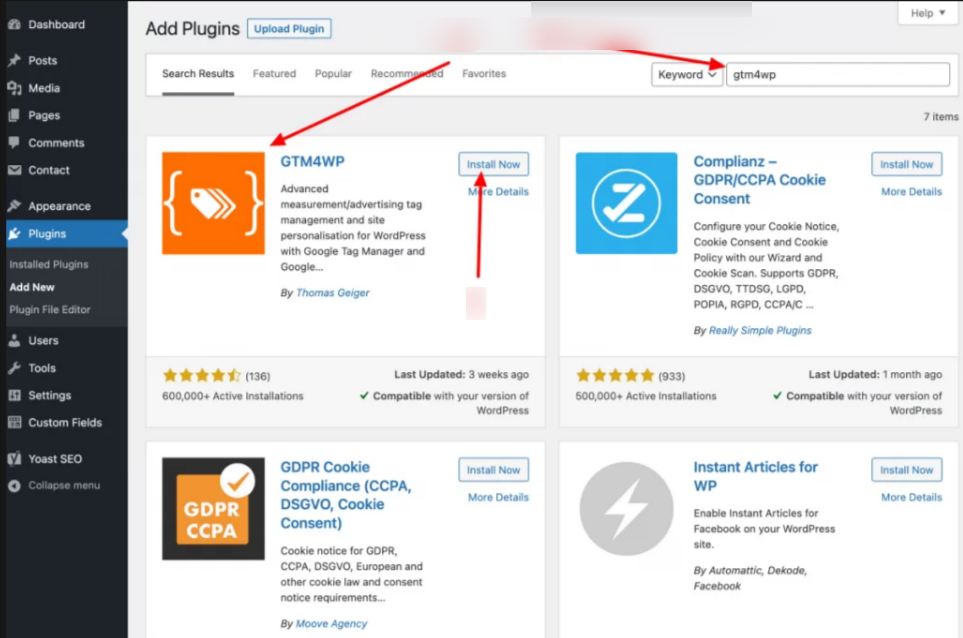
Step-5: Click on “Activate” for the plugin.
Time to add Google Tag Manager to WordPress:
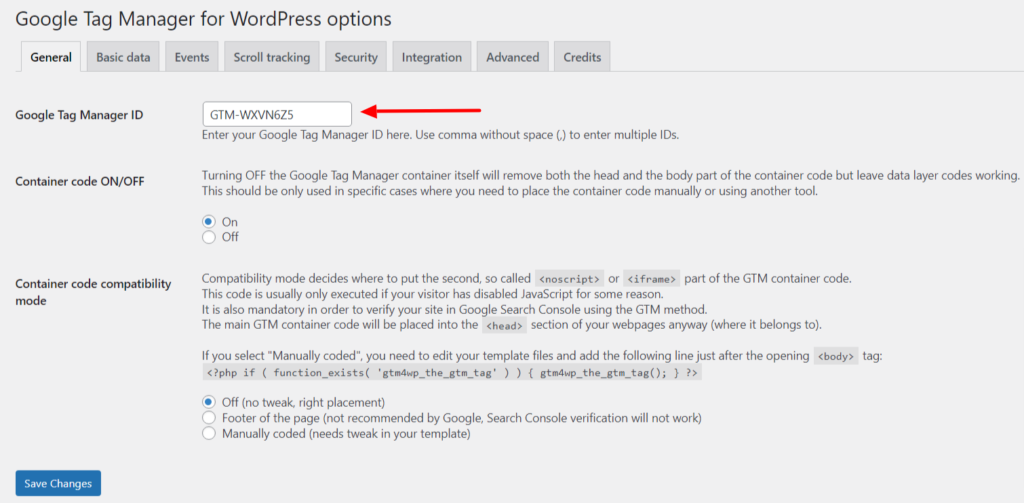
Step-6: Select Google Tag Manager under Settings in the WordPress sidebar.
Step-7: Into the available area, paste your Google Tag Manager ID (which you can find on the Google Tag Manager dashboard).
a. Simply select “Submit > Publish” Publish your Google Tag Manager container as usual.
Step-8: To install the container code on your website, the plugin provides several options. We advise making a backup of your website before implementing any of them.
a. Option 1: Off — with this selection, the plugin will try to determine where the container should be placed for you. Although it’s the simplest choice, there’s a chance it might break something on your site’s front end. If the codeless injection is the route you want to take, select it from the list and click “Save changes.”
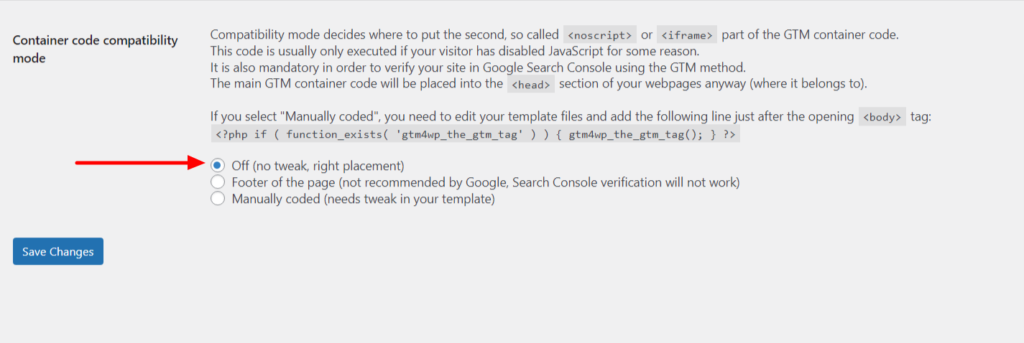
After choosing this, open the website in a new tab or window to confirm that everything appears to be in order. If so, you can proceed to the installation’s quality assurance testing.
b. Option 2: Manually Encoded – to use this choice, you’ll have to make a minor change to your theme files. You can utilize this option if your WordPress theme lets you make modifications and you’re confident with the theme editor. Click “Save Changes” after selecting the “Custom (requires adjustment in your template)” container code placement.
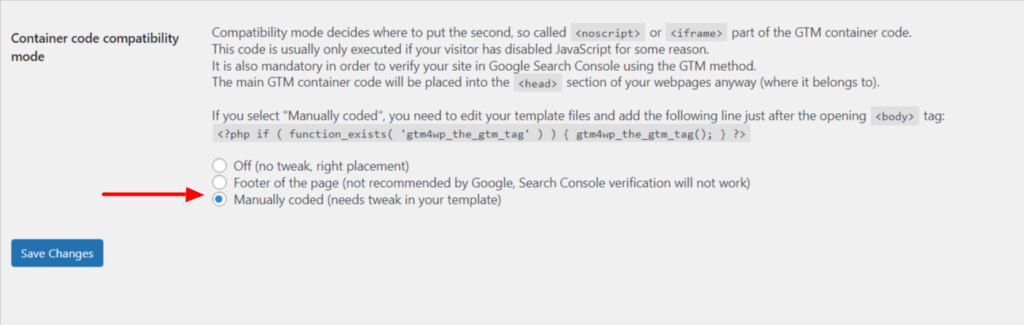
(i) After copying the plugin’s PHP code, click “Save Changes.”
(ii) Go to Appearance > Theme Editor in the WordPress sidebar.
(iii) Check if you are editing the theme that is presently installed on your website (you can check the name of the theme you are using by going to Appearance > Themes).
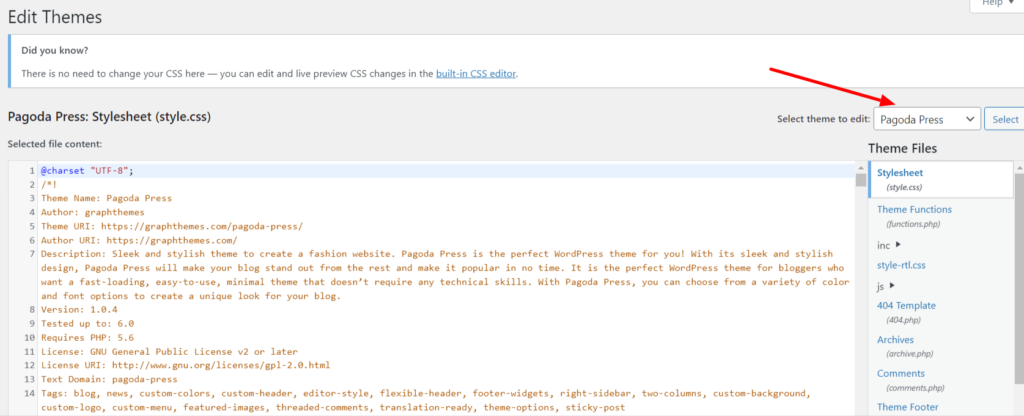
(iv) From the list on the right, pick the template labeled “Theme Header.”
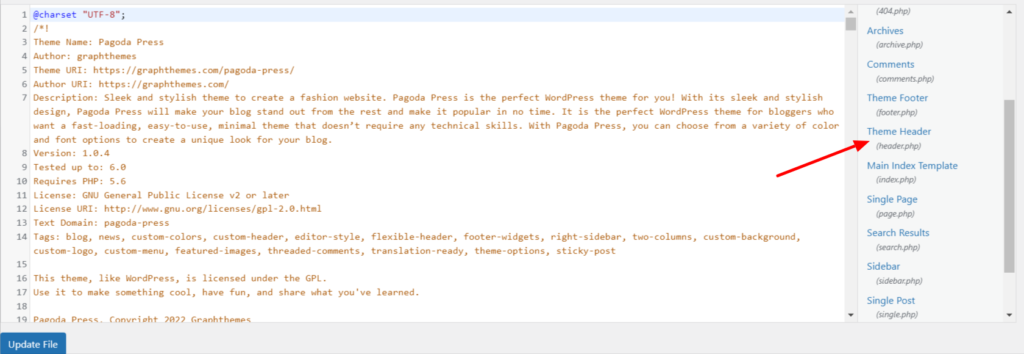
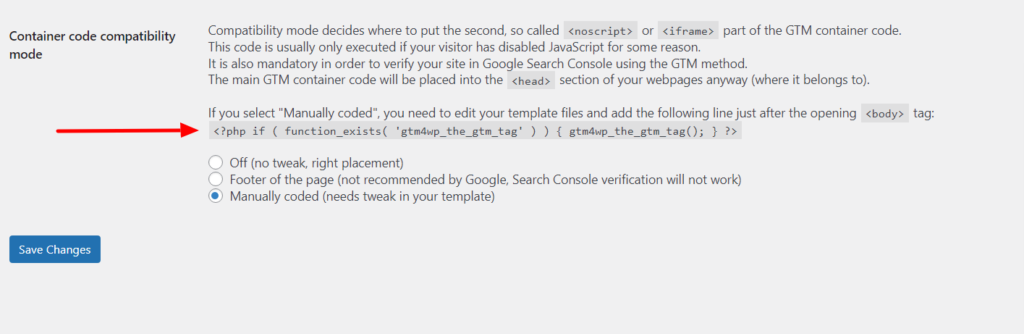
(v) Depending on the theme that you have installed, this template may be different. The <body> tag may always be found in the code, though.
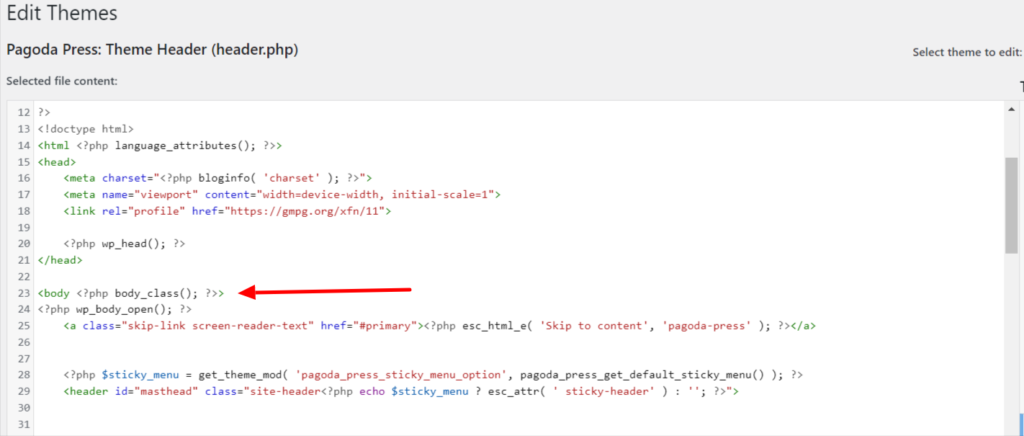
(vi) Just below the <body> tag, paste the PHP code that the plugin has provided.
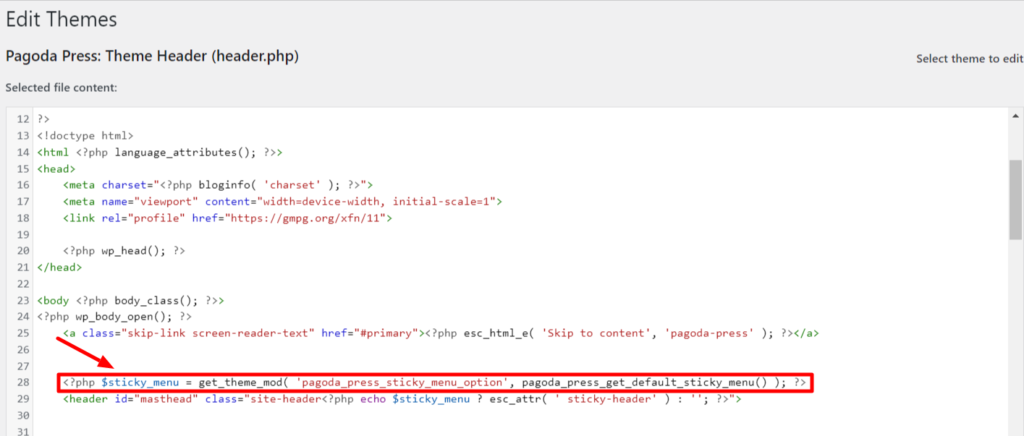
(vii) Select “Update File.”
Be sure you’ve got it Right!
Step-1: Launch Chrome and go to your website’s home page.
Step-2: Select the Chrome Extension for Google Tag Assistant.
Step-3: Select “Enable” option.
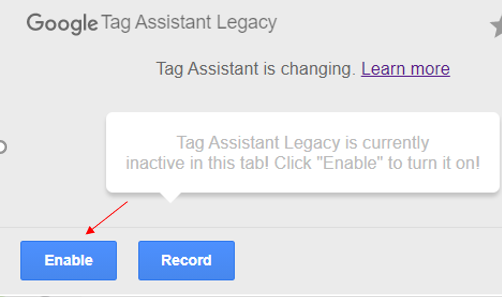
Step-4: Reload the website and select the Chrome Extension for Google Tag Assistant once more.
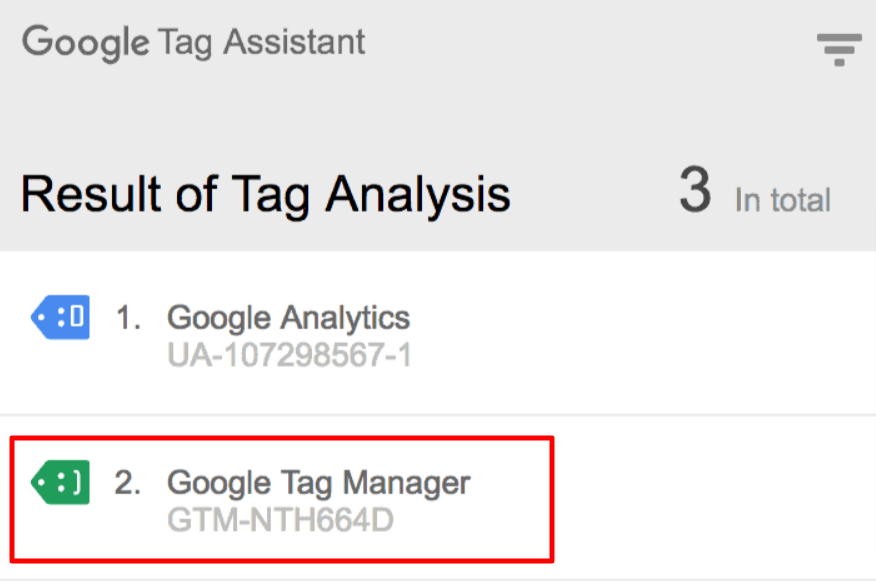
Step-5: If the installation was successful, a green Google Tag Manager tag should be visible.
Use Tags to Improve Website Performance
Once Google Tag Manager has been set up on your website, you are prepared to add code snippets (tags) that various tracking tools offer. Google marketing tools and other third-party services are among the more than 50 tag types that Google Tag Manager supports.
Additionally, you can use its interface to add unique HTML or JavaScript tags to your website.
Step-1: To create your first tag, click the “New Tag” icon.
Step-2: Select a tagged product.
Step-3: For the time being, we’ll use Google Analytics, but you can always add more tags and pick various products based on your requirements.
To add any further custom code snippets, you may even click on custom HTML.
Step-4: After selecting Google Analytics, a choice between Universal Analytics and Classic Analytics will be presented to you.
Step-5: Enter your analytics tracking ID when you select universal analytics.
This tracking ID is a unique code that identifies your website to Google. By login into your Google Analytics account and going to the Admin tab, you may get this ID.
Step-6: Click on tracking information to enlarge it after selecting the account and property for your website. The tracking code link will be visible.
Step-7: Once you click on the tracking code, it’ll bring you to the tracking code page and reveal your UA tracking ID.
Step-8: Paste your UA tracking ID into Google Tag Manager after copying it. Select Page View as the track type, then click the proceed button.
Fire the tag!
Step-1: When to fire this tag will now be a question in the tag configuration wizard. To create a new page, first, select all of the pages.
Step-2: You will now see a tracking code from Google Tag Manager that you must paste into your WordPress website. Copy this code.
Step-3: Install and turn on the plugin for Insert Headers and Footers. You must go to Settings » Insert Headers and Footers after activation.
Step-4: To save your settings, paste your tag manager code in the header section and press the save button.
Step-5: GTM tags won’t go active until the container is published. Visit the Google Tag Manager dashboard and click the “Publish” button.
Step-6: Additionally, Google Tag Manager will display the tags that were fired with each page view when you preview your website.
Step-7: That’s it! We’re done here.
Now that you’ve integrated your WordPress site with multiple marketing and tracking platforms, you can add other tags to your Google Tag Manager container by following the same procedure. Your website or app will be able to communicate with the Tag Manager servers once Tag Manager is deployed.
Then, you may define variables that can be used to simplify and automate your tag configurations, construct triggers that cause your tag to fire when specific events occur and set up tags using Tag Manager’s web-based user interface.
So, what are you waiting for? Install GTM to your WordPress website right away. If you get stuck somewhere, drop your queries in the comment section.